Introduction
Building a skincare routine often feels straightforward until several bottles sit on your bathroom counter. You might wonder whether your serum goes before your moisturizer, or how long you should wait before applying sunscreen. The sequence in which you apply your products can influence how well each formula settles on your skin.
Applying formulas in the wrong sequence may reduce their cosmetic benefits. A rich cream layered beneath a light, water-based serum may make it harder for the lighter liquid to spread evenly. On the other hand, layering your products systematically can help each layer settle.
At Timeless Skin Care, founded in 2009 by Veronica Pedersen, the focus has always been on simple formulas made in the USA in small batches. Knowing how to combine these targeted treatments into a daily routine allows you to organize your regimen. This guide covers the essential rules of product layering for both morning and evening routines. Learn more about the company on the About page.
Quick Answer: Skincare products should generally be applied from the thinnest texture to the thickest consistency, finishing with a broad-spectrum sunscreen in the morning and a moisturizer or facial oil at night.
The Core Principles of Product Layering
Product layering is guided by basic physical properties. When you understand why certain textures precede others, arranging your routine becomes simple.
Texture: Thinnest to Thickest
The fundamental rule of skincare layering is to move from the lightest consistency to the heaviest. Heavier creams and botanical oils contain lipid components that can form a surface layer.
If you apply a thick cream first, a watery toner or serum may be harder to layer evenly. Starting with thin liquids and moving toward rich creams can help each layer settle without interference. For additional guidance, read about how to layer multiple serums.
Base Composition: Water Before Oil
Water and oil repel one another. When formulating a regimen, apply your water-based treatments first. These include watery toners, essences, and light serums.
Once water-based products absorb, you can layer emulsion-based lotions, heavier creams, and face oils. Anhydrous or oil-based solutions generally follow water-based steps.
pH and Active Ingredient Placement
Certain active ingredients require a low, acidic pH environment. For that reason, some routines place low-pH formulas immediately after cleansing. Hydrating serums and standard lotions can then follow.
You can review ingredient definitions in the ingredient glossary.
| Product Format | Primary Base | Typical Placement in Routine |
|---|---|---|
| Cleanser | Water or Oil | Step 1 (Prep) |
| Toner or Essence | Water | Step 2 (Prep/Hydrate) |
| Water-Based Serum | Water | Step 3 (Targeted Treatment) |
| Emulsion / Light Lotion | Water and Oil | Step 4 (Moisture) |
| Rich Cream | Oil and Water | Step 5 (Barrier Support) |
| Facial Oil | Oil / Anhydrous | Step 6 (Occlusion) |
| Sunscreen | Mineral or Chemical Emulsion | Final Step (Daytime only) |


Morning Skincare Application Order
Your morning routine serves primarily to prepare your skin for daily environmental exposure. During daytime hours, your skin encounters ultraviolet radiation, ambient pollution, and shifting humidity levels. The steps below organize hydration and sunscreen application for the day.
Step 1: Cleanser
Start your morning by washing your face with a mild, non-stripping cleanser. Overnight, your skin accumulates natural oils, shedding dead surface cells, and residue from your evening products.
A gentle water-based wash clears this buildup without disrupting your natural surface lipids. If your skin feels dry upon waking, splashing your face with lukewarm water may be sufficient.
Step 2: Hydrating Toner or Mist
A hydrating toner balances the skin surface after cleansing and introduces lightweight surface hydration. Toners formulated with humectants help prepare your skin for subsequent concentrated treatments.
Pour a small amount into your palms and gently press the liquid into your face and neck. Avoid astringent toners containing high concentrations of denatured alcohol, as they can cause surface dryness.
Step 3: Daytime Antioxidant Serums
Morning use is a common recommendation for antioxidant serums. They help defend against oxidative stress caused by environmental factors such as UV exposure and pollution. They support the skin's antioxidant defenses.
Vitamin C is a widely utilized daytime antioxidant. In its pure L-ascorbic acid form, it helps brighten the look of dullness and uneven tone. The performance of L-ascorbic acid depends on several factors:
- The overall concentration in the formula
- The pH level of the base solution
- Packaging that limits air and light exposure
- The presence of stabilizing ingredients
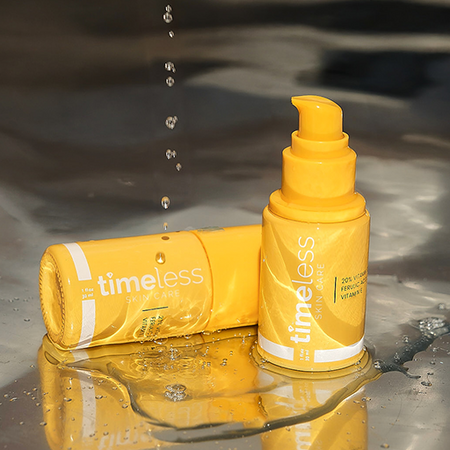
When Vitamin C is used in the morning, finish with a broad-spectrum sunscreen. The 20% Vitamin C + E Ferulic Acid Serum is an antioxidant serum.
Another valuable antioxidant is Coenzyme Q10. Coenzyme Q10 is a lipid-soluble antioxidant naturally found in skin. It provides antioxidant support as the skin's natural CoQ10 levels decline with age. It helps improve the appearance of fine lines. It supports firmer-looking skin.
The Coenzyme Q10 Serum is in the antioxidant category.
Note: If you have vitiligo, check with your dermatologist before using a CoQ10 product.
Step 4: Hydrating Serums and Peptides
After applying your primary antioxidant, you can layer a humectant serum or peptide treatment. Hyaluronic acid helps attract, bind, and retain water in the outer layers of the skin. It helps support hydration in the upper layers of the epidermis. It helps improve the appearance of dehydration lines.
Apply hyaluronic acid to slightly damp skin. Follow this with peptide serums. Peptides may help support the appearance of firmness.
Step 5: Eye Cream
The skin surrounding the eyes is naturally thinner than facial skin elsewhere. If you choose to include an eye cream, apply a pea-sized amount using your ring finger along the orbital bone.
Light tapping motions distribute the product without stretching the delicate skin. Applying eye cream before your full-face moisturizer allows its targeted ingredients to settle without being diluted by heavier facial creams.
Step 6: Daytime Moisturizer
A lightweight daytime moisturizer helps reduce moisture loss while keeping the skin feeling smooth throughout the day. Look for formulas containing ceramides, fatty acids, or humectants that reinforce the skin surface without feeling greasy under makeup.
Gently massage the moisturizer over your entire face and neck, moving in upward strokes. If you have an oilier skin type, a light gel-cream may provide adequate hydration without excess weight.
Step 7: Broad-Spectrum Sunscreen
Sunscreen is the mandatory final step of every morning skincare routine. Apply a generous layer of broad-spectrum sunscreen with an SPF rating of 30 or higher 15 minutes before sun exposure.
Never mix your sunscreen directly with serums or moisturizers, as blending formulas alters the emulsion and dilutes the protective film. Reapply your sunscreen every two hours when spending extended time outdoors.
AM Routine Summary
- Cleanse with a gentle face wash or lukewarm water.
- Apply an alcohol-free hydrating toner.
- Layer an antioxidant serum across the face and neck.
- Apply a hydrating humectant or peptide serum.
- Tap eye cream gently around the orbital bone.
- Smooth a lightweight moisturizer over the face.
- Finish with a broad-spectrum sunscreen of SPF 30 or higher.
Evening Skincare Application Order
Your evening routine can prioritize thorough cleansing, targeted treatments, and moisture.
PM Routine Summary
- Dissolve makeup and sunscreen with a cleansing oil or balm.
- Wash the face with a gentle water-based cleanser.
- Apply a chemical exfoliant on designated treatment nights.
- Smooth targeted serums, such as retinoids or Vitamin B5, over the skin.
- Tap a nourishing eye cream around the eye area.
- Apply a rich night cream to support the skin barrier.
- Apply facial oil if extra moisture is needed.
Step 1: First Cleanse (Makeup and Sunscreen Removal)
Throughout the day, long-wearing makeup, mineral pigments, and water-resistant sunscreen bind to surface sebum. A dedicated oil-based cleanser or cleansing balm breaks down these oil-soluble substances efficiently.
Massage the cleansing oil onto dry skin for 60 seconds, allowing it to dissolve stubborn surface debris. Rinse thoroughly with lukewarm water until the product emulsifies into a milky liquid and washes away.
Step 2: Second Cleanse (Water-Based Wash)
Follow your first cleanse with a gentle water-based foaming or cream cleanser. This second step clears away residual water-soluble impurities, sweat, and environmental grime, leaving the surface clear.
Pat your skin dry with a soft towel rather than rubbing vigorously.
Step 3: Chemical Exfoliation (2 to 3 Evenings Weekly)
Exfoliating toners or liquid treatments containing alpha-hydroxy acids (AHAs) or beta-hydroxy acids (BHAs) help remove dead surface skin cells. Regular exfoliation smooths surface texture and clears clogged pores.
Apply chemical exfoliants in the evening immediately after cleansing. Limit this step to two or three times per week to avoid over-exfoliation. On evenings when you use exfoliating acids, avoid pairing them with strong retinoids in the same application.
Step 4: Nighttime Serums and Barrier Support
On evenings when you do not exfoliate, use this step for targeted treatments such as retinoids, barrier-supporting serums, or concentrated hydrators.
Vitamin B5 supports the skin barrier and helps the skin retain moisture. It also helps the skin feel more comfortable following exposure to dry air or active treatments. For related information, read about the 3 benefits of Vitamin B5.
The Hyaluronic Acid 100% Pure is in the hydration category.
Step 5: Eye Cream
Reapply your eye cream at night to support skin hydration around the eye contour while you sleep. Look for nourishing formulas containing peptides or humectants to keep the surface supple. Dab a small amount around the orbital bone, taking care not to place the formula too close to the lash line.
Step 6: Nighttime Moisturizer
Night creams are typically richer in emollients and occlusive agents than daytime lotions. A nourishing moisturizer helps reduce transepidermal water loss (TEWL), the water that evaporates from the skin's surface during the overnight hours.
Smooth a generous layer over your face, neck, and upper chest. Ingredients like shea butter, squalane, and cholesterol help keep the skin barrier feeling replenished until morning.
Step 7: Occlusive Facial Oils (Optional)
If your skin experiences persistent dryness or during harsh winter weather, a facial oil can serve as a final barrier step. Oils do not hydrate the skin directly because they contain no water, but they act as occlusive agents that help reduce moisture loss.
Warm two to three drops of face oil between your palms and gently press them over your moisturizer.
How to Layer Active Ingredients Without Irritation
Incorporating multiple active ingredients into a single routine requires thoughtful planning. Layering too many concentrated treatments at once can stress the skin barrier.
Understanding Ingredient Compatibility
Certain ingredients work harmoniously within the same routine, while others are best separated between morning and evening applications.
- Vitamin C and Peptides: While gentle peptide serums can often follow stable forms of Vitamin C, apply L-ascorbic acid in the morning and reserve peptide treatments for your evening routine.
- Direct Acids and Retinoids: Combining glycolic, lactic, or salicylic acid with retinol in the same routine increases the potential for irritation. Rotate these ingredients on alternating nights.
- Hyaluronic Acid and Actives: Hyaluronic acid can be used alongside Vitamin C, peptides, niacinamide, and retinoids. Hyaluronic acid helps attract, bind, and retain water in the outer layers of the skin. For more information, read about using hyaluronic acid and Vitamin C together.
- Vitamin B5 and Exfoliants: Vitamin B5 supports the skin barrier and helps the skin retain moisture. It also helps the skin feel more comfortable.
Managing Active Steps
You do not need to apply every active ingredient every day. A streamlined rotation often yields better cosmetic results than piling multiple formulas onto your skin simultaneously.
| Active Ingredient | Recommended Time of Day | Ideal Placement | Compatible Partners | Incompatible in Same Step |
|---|---|---|---|---|
| L-Ascorbic Acid | Morning | Immediately after cleansing | Ferulic Acid, Hyaluronic Acid | High-strength AHA/BHA |
| CoQ10 | Morning or evening, generally once daily | Step 3 or 4 (Serum) | Hyaluronic Acid, Squalane | Heavy occlusive bases prior to use |
| Retinoids | Evening | Step 4 (Serum step) | Ceramides, Peptides, B5 | Direct AHA/BHA acids |
| AHA / BHA Acids | Evening (2-3x weekly) | Step 3 (Immediately post-cleanse) | Hyaluronic Acid, Vitamin B5 | Retinoids, pure L-ascorbic acid |
| Peptides | Morning or Evening | Step 4 (Post-toner/water serums) | Hyaluronic Acid, Ceramides | Highly acidic direct exfoliants |
Key Takeaway: Space potent actives across morning and evening routines or alternate them by day to maintain skin comfort and support barrier performance.
Realistic Timelines and Managing Skin Expectations
Achieving noticeable cosmetic improvements requires consistency over time. Skincare products do not transform the appearance of your complexion overnight. The skin's natural renewal cycle takes several weeks, meaning visible changes in texture, tone, and fine lines develop gradually.
Ingredients that help brighten the look of dullness and uneven tone, such as Vitamin C, may show progressive improvements with sustained application. Similarly, formulas that support firmer-looking skin require steady use alongside daily sun protection.
Individual skin reactions vary considerably based on sensitivity, climate, and underlying skin health. If you introduce several concentrated products simultaneously and notice redness or tightness, pause your active treatments. Anyone with a known sensitivity or diagnosed skin condition should check with their dermatologist before starting an intensive active regimen.
Frequently Asked Questions
How long should I wait between applying each skincare step?
Most skincare products do not require extensive waiting times between layers. You can generally proceed to your next step once the previous serum or toner has absorbed and no longer feels tacky on the surface. The main exception is chemical sunscreen, which should sit undisturbed for approximately 15 minutes before sun exposure or makeup application.
Should I apply serums to wet or dry skin?
Water-binding humectant serums containing hyaluronic acid may be applied to slightly damp skin. Hyaluronic acid helps support hydration in the upper layers of the epidermis. However, concentrated acidic treatments, such as L-ascorbic acid or direct exfoliating acids, should be applied to completely dry skin after cleansing to minimize the risk of surface irritation.
Can I layer two different serums in the same routine?
Yes, you can layer multiple serums in a single routine by adhering to the thinnest-to-thickest rule. Apply your lightest, water-based serum first, allow it to absorb for a few seconds, and follow with slightly denser treatments. To avoid overloading your skin, it is generally best to limit your routine to two concentrated serums per application.
What should I do if my products begin to pill when layered?
Pilling occurs when products fail to absorb and form tiny balls on the surface of the skin. This typically happens when too much product is used, when an oil-based product is applied beneath a water-based formula, or when incompatible silicone polymers clash. To prevent pilling, use smaller amounts of product, allow each layer to settle, and strictly apply water-based formulas before heavier creams.